
If you are building a web or mobile application, there will probably come a point when you need to store information somewhere.
Maybe your project needs to save user accounts. Maybe you are building an online store that needs products and orders. Or perhaps you are creating a simple student management system where you need to store names, emails, courses, and other details.
This is where a database comes in.
MongoDB is one of the popular database options for modern applications. It works particularly well with JavaScript and Node.js projects, and its document-based structure can feel familiar if you have already worked with JSON.
The good news is that setting up MongoDB doesn’t have to be difficult, even if you are new to databases. AI coding assistants can also make the process easier. You can use AI to explain MongoDB concepts, create starter code, design database models, find errors, and help you understand unfamiliar code.
However, there is an important difference between using AI as a coding assistant and simply copying everything it generates.
In this guide, we’ll go through the complete process of setting up MongoDB in a simple Node.js project. We’ll also look at how AI can help at each stage and how to use it without creating unnecessary problems in your project.
What Is MongoDB?
MongoDB is a NoSQL database that stores information as documents.
If you have worked with JSON, the structure will look familiar.
For example, a user could be stored like this:
{
  "name": "Rahul Kumar",
  "email": "rahul@example.com",
  "course": "MCA"
}
A group of related documents is stored in a collection.
For example, a MongoDB database might contain collections such as:
users
products
orders
payments
messages
This is different from a traditional relational database, where information is usually organized into tables, rows, and columns.
MongoDB is commonly used for:
- Web applications
- Mobile applications
- E-commerce websites
- REST APIs
- CRM systems
- Chat applications
- Blogging platforms
- Student management systems
- SaaS applications
MongoDB, MongoDB Atlas, and Mongoose: What’s the Difference?
These three names can be confusing when you’re starting out.
They are not the same thing.
MongoDB
MongoDB is the database system itself. It stores your application’s data.
MongoDB Atlas
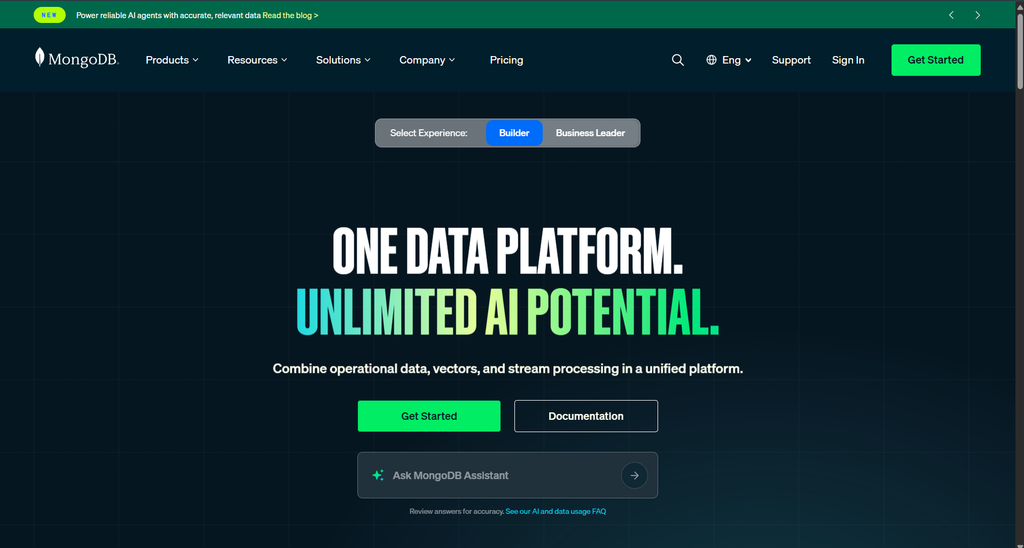
MongoDB Atlas is MongoDB’s managed cloud database service. Instead of installing and managing MongoDB on your own computer or server, you can create a database deployment in the cloud.
Mongoose
Mongoose is a popular Object Data Modeling (ODM) library for Node.js applications that work with MongoDB.
It gives you features such as schemas, models, validation, and a convenient way to interact with your database.
You can also use MongoDB’s official Node.js driver without Mongoose. Which option is appropriate depends on your project and development preferences.
For the example in this article, we’ll use Node.js, Express, MongoDB Atlas, and Mongoose.
What You Need Before Starting
You don’t need a complicated setup for this tutorial.
You’ll need:
- Node.js installed on your computer
- VS Code or another code editor
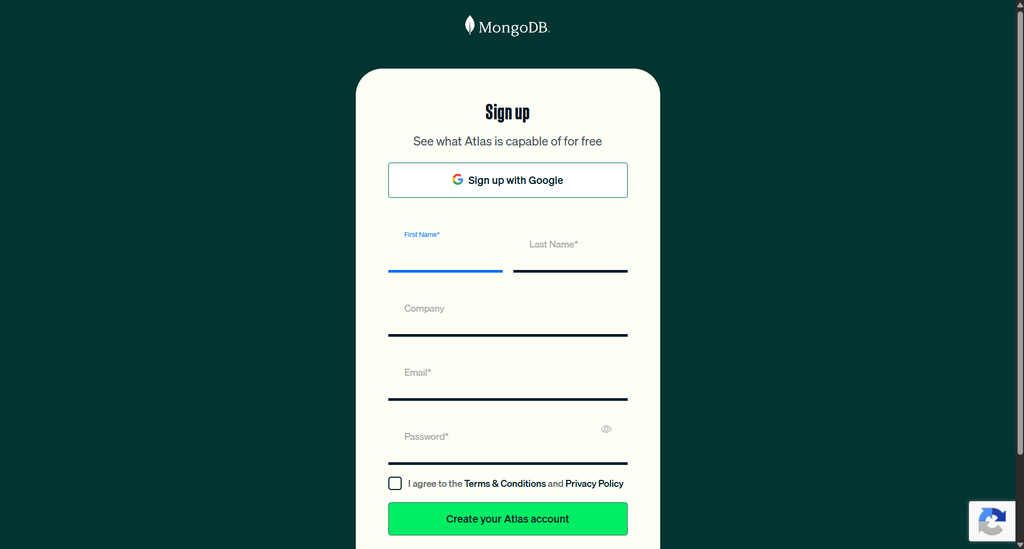
- A MongoDB Atlas account
- An internet connection
- An existing Node.js project or a new project
- An AI coding assistant, if you want AI to help with the development
If you are completely new to Node.js, it is worth learning the basics first. You don’t need to become an expert, but understanding variables, functions, modules, npm, and asynchronous code will make the database setup much easier to follow.
Step 1: Create a Node.js Project
Let’s start with a small project.
Create a folder called:
student-api
Open the folder in VS Code and open the terminal.
Run:
npm init -y
This creates a package.json file.
Now install the packages we’ll use:
npm install express mongoose dotenv
These packages have different jobs.
Express will handle our server and API routes.
Mongoose will help our Node.js application communicate with MongoDB.
dotenv will allow us to keep configuration values such as the MongoDB connection string in an environment file.
At this point, your project can have a simple structure like:
student-api/
│
├── node_modules/
├── package.json
├── package-lock.json
└── server.js
Step 2: Create a MongoDB Atlas Database
Now we need somewhere to store our data.
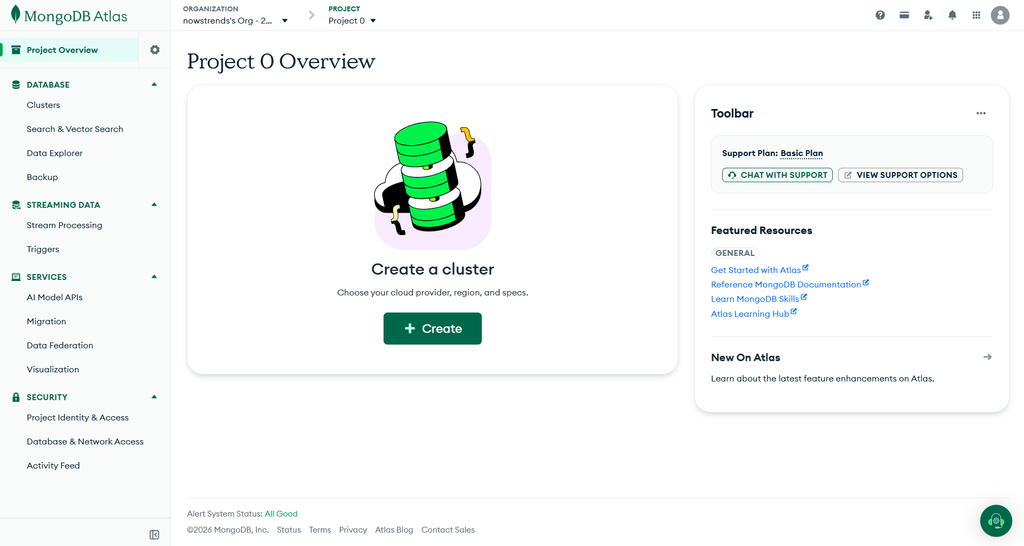
MongoDB Atlas lets you create a MongoDB deployment in the cloud.
After creating your Atlas account, create a deployment and follow the setup process.
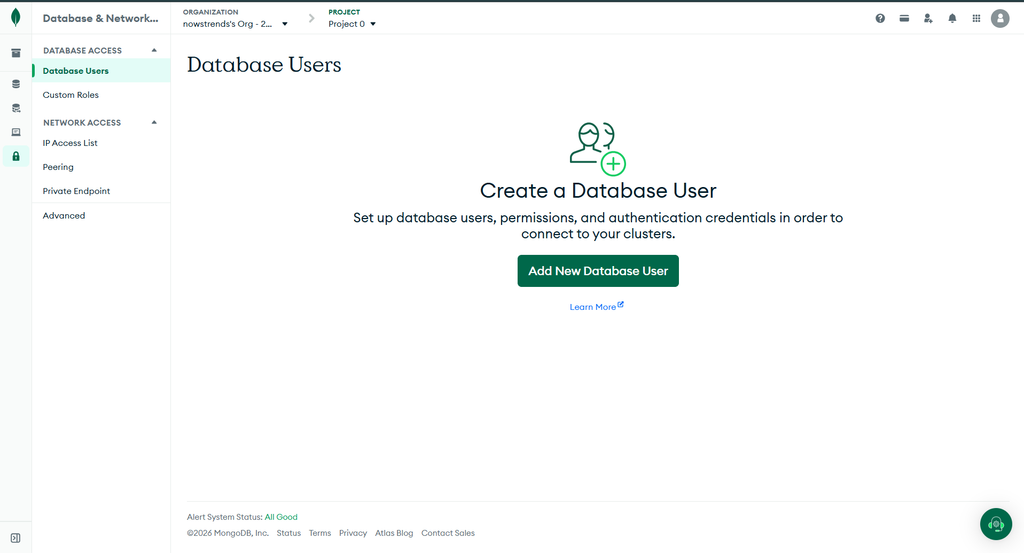
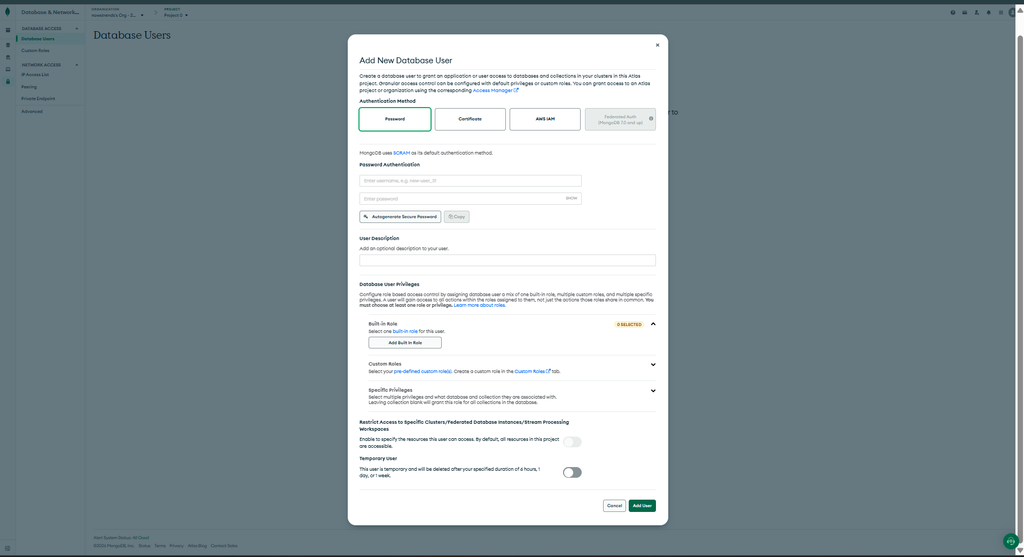
You’ll also need to create a database user.
Keep the username and password safe because your application will use these credentials when connecting to MongoDB.
You may also need to configure the network access settings so that your application can connect to the deployment.
Once the database is ready, Atlas provides a connection string.
It will look similar to this:
mongodb+srv://username:password@cluster.example.mongodb.net/studentdb
Your actual connection string will be different.
Don’t copy the example above literally. Use the connection string provided for your own MongoDB deployment.
Step 3: Never Put Your Database Password Directly in Your Code
This is one of the most important things to understand.
You might be tempted to write:
mongoose.connect("mongodb+srv://username:password@...");
Don’t do that in a real project.
Your database credentials should not be sitting inside your source code.
Instead, create a file called:
.env
Inside it, add:
MONGODB_URI=your_mongodb_connection_string
For example:
MONGODB_URI=mongodb+srv://username:password@cluster.example.mongodb.net/studentdb
Replace this with your actual connection string.
Now create a .gitignore file:
node_modules/
.env
This helps prevent your .env file from being accidentally committed to a Git repository.
Step 4: Connect Node.js to MongoDB
Now let’s connect our application to the database.
Open server.js and add:
const express = require("express");
const mongoose = require("mongoose");
require("dotenv").config();

const app = express();

app.use(express.json());

mongoose
  .connect(process.env.MONGODB_URI)
  .then(() => {
    console.log("MongoDB connected successfully");
  })
  .catch((error) => {
    console.error("MongoDB connection failed:", error.message);
  });

app.get("/", (req, res) => {
  res.send("Student API is running");
});

const PORT = 5000;

app.listen(PORT, () => {
  console.log(`Server running on port ${PORT}`);
});
Start the application:
node server.js
If the connection is configured correctly, your terminal should show a successful MongoDB connection message.
You can also open:
http://localhost:5000
in your browser.
You should see:
Student API is running
What Is AI’s Role Here?
This is a good place to start using AI.
Instead of asking an AI assistant to build your entire application, ask it to explain what you already have.
For example:
“Explain this Node.js MongoDB connection code line by line. I’m a beginner. Explain what dotenv, process.env.MONGODB_URI, mongoose.connect(), promises, and catch() are doing.”
This type of prompt is much more useful for learning.
You’ll understand not only what the code does, but also why it is written that way.
Step 5: Create a Student Model
A database connection alone isn’t enough. Our application needs to know what information we want to store.
Let’s create a folder called:
models
Inside it, create:
Student.js
Add:
const mongoose = require("mongoose");

const studentSchema = new mongoose.Schema(
  {
    name: {
      type: String,
      required: true
    },

    email: {
      type: String,
      required: true,
      unique: true
    },

    course: {
      type: String,
      required: true
    }
  },
  {
    timestamps: true
  }
);

module.exports = mongoose.model("Student", studentSchema);
This schema tells Mongoose what a student document should look like.
Our student has three main fields:
nameemailcourse
The required: true option means those fields are expected when creating a student.
The unique: true option is used to create a uniqueness constraint/index for the email field. It should not be treated as a replacement for application-level validation.
Step 6: Ask AI to Design Your Database
This is one of the areas where AI can save a lot of time.
Imagine you’re creating an online bookstore.
You could ask:
“I’m building an online bookstore using Node.js, Express, and MongoDB. Customers can create accounts, browse books, add books to a cart, place orders, and view their order history. Before writing any code, suggest a suitable MongoDB collection structure. Explain what each collection is responsible for and how the collections relate to each other.”
This is much better than saying:
“Create my MongoDB database.”
Why?
Because you’re asking AI to think about the requirements first.
It might suggest collections such as:
users
books
orders
carts
reviews
You can then review the design before writing any code.
If something doesn’t make sense, ask AI to explain it.
Step 7: Create an API to Save Data
Now let’s create an API that allows us to add students to MongoDB.
In server.js, import the model:
const Student = require("./models/Student");
Then add this route:
app.post("/students", async (req, res) => {
  try {
    const student = await Student.create(req.body);

    res.status(201).json(student);
  } catch (error) {
    res.status(500).json({
      message: "Failed to create student",
      error: error.message
    });
  }
});
Now our application can receive student information and store it in MongoDB.
For example, a request body could be:
{
  "name": "Rahul Kumar",
  "email": "rahul@example.com",
  "course": "MCA"
}
If everything works correctly, MongoDB will store the document.
Step 8: Read Data From MongoDB
Saving information is only half of the job.
We also need to retrieve it.
Add:
app.get("/students", async (req, res) => {
  try {
    const students = await Student.find();

    res.json(students);
  } catch (error) {
    res.status(500).json({
      message: "Failed to fetch students",
      error: error.message
    });
  }
});
Now visit:
http://localhost:5000/students
If you already added students, the API should return the stored documents.
This gives you a very simple MongoDB-powered API.
Step 9: Use AI to Create CRUD APIs
Once you understand the basic process, AI can help with repetitive development work.
CRUD means:
Create — add data
Read — retrieve data
Update — change existing data
Delete — remove data
Instead of asking:
“Make CRUD APIs.”
Give AI your actual requirements.
For example:
“I have a Node.js Express project using Mongoose. I already have a Student model containing name, email, and course. Create REST API endpoints for creating, reading, updating, and deleting students. Use async/await, return appropriate HTTP status codes, validate input, and handle database errors. Do not modify unrelated files.”
This gives the AI much more useful context.
Step 10: Test Your Database
Don’t stop after seeing “MongoDB connected successfully.”
A successful connection doesn’t necessarily mean that your entire database functionality works correctly.
Test the complete process.
For example:
Create a student
Send:
{
  "name": "Amit Kumar",
  "email": "amit@example.com",
  "course": "MCA"
}
Retrieve students
Call:
GET /students
Check MongoDB
Open your MongoDB Atlas dashboard and check whether the document appears in the appropriate collection.
This simple test confirms that your application can actually communicate with the database.
How to Ask AI for Help When Something Goes Wrong
One of the most useful things AI can do is help you understand error messages.
But don’t simply paste an error and say:
“Fix this.”
Give the AI some context.
For example:
“I’m building a Node.js Express application with MongoDB Atlas and Mongoose. My application starts, but the database connection fails. Here is the complete error message, my connection code, and my
.envvariable name. Please identify the likely cause and explain the fix. Don’t change unrelated parts of my project.”
Then include the relevant error and code.
This makes it much easier for the AI to give you a useful answer.
Common MongoDB Problems
Here are some issues beginners commonly encounter.
| Problem | Possible reason |
|---|---|
| Authentication failed | Incorrect database username or password |
| Connection timeout | Network or access configuration problem |
| IP not allowed | Your connection isn’t permitted by Atlas network settings |
MONGODB_URI is undefined | .env isn’t being loaded correctly |
| Invalid connection string | The URI has been copied or formatted incorrectly |
| Duplicate key error | A unique field already exists |
| Data isn’t appearing | The API may not have successfully inserted the document |
When troubleshooting, don’t immediately change five things at once.
Check one possibility at a time.
That makes it much easier to find the actual cause.
A Useful AI Prompt for MongoDB Errors
You can save this prompt for future projects:
I'm using Node.js, Express, MongoDB, and Mongoose.

My problem is:
[describe the problem]
Complete error message:
[paste error]
Relevant code:
[paste code]
Expected behavior:
[what should happen]
Actual behavior:
[what is happening]
Please: 1. Explain the likely cause in simple language. 2. Identify the problematic part of the code. 3. Give me the smallest safe fix. 4. Explain why the fix works. 5. Don’t change unrelated parts of the project.
This is much more effective than asking AI to rewrite your entire backend.
Don’t Give Your Secrets to AI
There’s one rule worth remembering whenever you’re using AI for development:
Don’t paste sensitive credentials into an AI chat.
This includes:
- MongoDB passwords
- Database connection strings containing credentials
- API keys
- Authentication tokens
- Private certificates
- Payment credentials
- Customer information
Instead of sharing your real connection string, replace sensitive information with placeholders.
For example:
mongodb+srv://USERNAME:PASSWORD@CLUSTER/DATABASE
Then ask AI to work with the structure.
You can keep your actual credentials inside your local .env file.
Can React Connect Directly to MongoDB?
If you’re building a React frontend, don’t normally connect React directly to MongoDB.
A common architecture looks like this:
React
   ↓
API
   ↓
Node.js + Express
   ↓
Mongoose
   ↓
MongoDB
The frontend communicates with your backend.
The backend communicates with MongoDB.
This keeps your database credentials and database operations on the server rather than exposing them to users in the browser.
A Simple Project Structure
As your application grows, you may want to organize it like this:
student-api/
│
├── models/
│   └── Student.js
│
├── routes/
│   └── studentRoutes.js
│
├── controllers/
│   └── studentController.js
│
├── config/
│   └── database.js
│
├── middleware/
│
├── .env
├── .gitignore
├── server.js
├── package.json
└── package-lock.json
You don’t have to use this exact structure for every project.
A small application can be much simpler.
The important thing is to keep your code organized as the project becomes larger.
AI can help reorganize an existing project, but be careful about asking it to restructure everything at once. Make a backup or commit your working code before making major changes.
The Best Way to Use AI When Building With MongoDB
AI is most useful when you treat it as a development assistant rather than an automatic project generator.
A good workflow looks like this:
1. Explain the project
Tell AI what you’re building and who will use it.
2. Design the database
Ask AI to suggest collections and relationships before writing models.
3. Review the design
Make sure every collection and field has a reason to exist.
4. Generate the basic code
Let AI help create models, routes, controllers, or queries.
5. Understand the code
Ask AI to explain unfamiliar sections.
6. Test each feature
Don’t assume generated code works just because it looks correct.
7. Debug problems
Give AI the actual error, relevant code, and expected behavior.
8. Review security
Ask AI to identify exposed credentials, weak validation, unsafe APIs, and other potential problems.
9. Make the final decision yourself
AI can suggest a solution, but you should decide whether it belongs in your application.
Example: A Better AI Prompt for a Real Project
Suppose you’re building an online medicine delivery application.
Instead of asking:
“Create a MongoDB database for my medicine app.”
Try something like this:
I'm building a medicine delivery platform using Node.js,
Express, and MongoDB.

The application has three types of users:

1. Customers
2. Pharmacies
3. Administrators

Customers can search medicines, add products to a cart,
place orders, and view their order history.

Pharmacies can manage medicines, prices, stock,
orders, and customer requests.

Administrators can manage users, pharmacies, medicines,
and platform settings.

First, design the MongoDB collections.

Do not write code yet.

For each collection:
- Explain its purpose.
- List the important fields.
- Explain relationships with other collections.
- Identify fields that may need indexes.
- Point out possible data duplication.
- Explain any security concerns.

Wait for my approval before generating the models.
This kind of prompt encourages AI to think about the database before producing hundreds of lines of code.
check here for MongoDB: The World’s Leading Modern Data Platform | MongoDB
Which AI Debugging Tools is best in 2026? – nowstrends.com
Which AI Note-Taking Tools for Students in 2026? – nowstrends.com
How to choose Backend tool for Mobile App Development in 2026? – nowstrends.com